Assassin's Creed Black Flag Resynced: Quest Item Locations & Interactive Tracking Guide
Quest Items in Assassin's Creed Black Flag Resynced are the 15 story-critical objects — keys, artifacts, investigation clues, and documents — that Edward Kenway acquires, examines, and carries across the early campaign.
Unlike collectibles, Quest Items are not optional: every one is tied to a specific Main Quest objective and cannot be missed during normal story progression.
The Quest Item locations are fully documented on our AC BF Resynced interactive maps.
Three Quest Item Types
- Story-automatic items — received directly from cutscenes or as automatic quest rewards without any additional interaction required.
- Interactive investigation objects — environmental clues that must be examined by pressing the interact button when standing next to them.
- Looted or pickpocketed keys — carried by specific named enemies. Either taken by stealth (pickpocketing without detection) or by force (assassination, knockout).
Sequence 1: Cape Bonavista
Glass Cube — awarded automatically after defeating Boss Duncan Walpole on Cape Bonavista. The mysterious Templar artifact that Walpole was transporting drives the entire game's central mystery. Required to progress Sequence 1.
Sequence 2: Havana
- Stede's Money Purse — retrieved during "Lively Havana" in Havana. A pickpocket steals the purse from Stede while Edward synchronises the first Viewpoint — chase the thief, recover the purse, and return it to Stede to continue the quest.
- Castillo Warehouse Key — carried by Captain Mendoza during the "...And My Sugar?" quest. Two acquisition methods: pickpocket him from behind while he patrols the upper wall of Castillo de la Real Fuerza, or knock him out while he inspects goods on the upper wall. Either method gives the key without triggering combat. Used to unlock the store room on the upper wall and retrieve the Stolen Goods.
- Record of Confiscated Goods — a document found inside the eastern Castillo de la Real Fuerza tower during "...And My Sugar?" Enter via the northern window by dropping from the upper wall. Provides optional information confirming where the stolen goods are stored.
- Stolen Goods — found inside the room on the roof of Castillo de la Real Fuerza, during "...And My Sugar?" Accessing the room requires the Castillo Warehouse Key looted from Captain Mendoza first.
- Templar Ring — received automatically from Governor Torres during "Mister Walpole, I Presume?" at the Governor's Mansion. Confirms Edward's false identity as a Templar operative.
- Curious Schematic — received automatically after leaving the Governor's Mansion during "Mister Walpole, I Presume?" A mysterious diagram that feeds into the game's larger Observatory mystery.
- Notice — a document pinned on a wooden board, readable during "Claiming What's Due." Provides information about the Sage's whereabouts inside Torres' prison compound.
- Havana Prison Key — carried by the warden who spawns in the courtyard during "Claiming What's Due." Assassinate him to collect the key, then use it to release the Sage from his cell.
- Havana Warehouse Key — looted from the officer patrolling the northern side of Havana's plantation after completing "This Tyro Captain." Officer and key only spawn once that quest is done. Opens the Havana Warehouse to plunder — which rewards the "Saint Jerome as Cardinal" Painting.
Sequence 3: Abaco Island — The Investigation
"This Tyro Captain" includes a short investigation mini-sequence on Abaco Island where all four clues must be examined before the Ocelot hunt and crafting tutorial unlock:
- Unspoiled Crates — loot the intact crates in the Abaco Island camp to confirm supplies weren't taken.
- Mauled Men — examine the bodies to identify the cause of the attack.
- Fish — examine the fish left in front of the tent for evidence of what predator was present.
- Pawprints — examine the prints behind the broken cart to confirm an Ocelot was responsible. All four clues together identify that a hunting Ocelot disrupted the camp — leading directly to the "Hunt and skin 2 Ocelots" objective.
Sequence 3: Nassau
Nassau Warehouse Key — looted from the officer on the island's southern beach as the story progresses through "Now Hiring" continues.
Opens the Nassau Warehouse — which rewards the "Harbor Scene at Sunset" Painting.
All other Key Items can be found in the list below.
| Name | Map Location | Details | Screenshot | Found |
|---|---|---|---|---|
| Locate the SagePrincipe | Principe | The location of the sage during the main quest "Trust is Earned". | ||
| Burgess' OrdersPrincipe | Principe | Related Quest: Burgess' Orders letter can be found atop two crates along the wooden boardwalk within the restricted area. | ||
| Witless FoolsCumberland Bay | Cumberland Bay | Related Quests:Witless Fools is a letter and quest item you'll have to find and investigate while playing the "Loyalty, Discipline, and Courage" officer. Quest. Look for it on a barrel in the small camp on the southeastern side of the island. | ||
| Chamberlaine's PlansNassau | Nassau | |||
| Mark the Kegs x2Nassau | Nassau | Related Quest:During the main quest "The Gunpowder Plot," you will have to make your way into this restricted cave to find and mark these kegs of gunpowder. You'll find 2 inside of the small cave. | ||
| Mark the KegNassau | Nassau | Related Quest:During the main quest "The Gunpowder Plot," you will have to make your way into this restricted camp to mark these kegs of gunpowder. You'll find 2 inside of this camp: 1 on the north side and the other on the south. | ||
| Mark the KegNassau | Nassau | Related Quest:During the main quest "The Gunpowder Plot," you will have to make your way into this restricted camp to mark these kegs of gunpowder. You'll find 2 inside of this camp; 1 on the north side, and the other on the south. | ||
| Letter to the CommodoreNassau | Nassau | Related Quest:After trailing the Captain to the Chamberlaine's enemy-guarded mansion, your first objective will be to obtain the "Letter to a Commodore" from him. Whistle him over into some bushes and then loot the letter after taking him out. | ||
| Map on the WallNassau | Nassau | Related Quest:Once you have the letter from Chamberlaine's captain, you must locate three clues inside the mansion. Enter through one of the top-floor windows to find all three clues conveniently located in a single room. For the first clue, interact with the map pinned to the south wall to learn that Chamberlaine has set up camp somewhere on the southern part of the island. | ||
| Letter on the DeskNassau | Nassau | Related Quest:Once you have the letter from Chamberlaine's captain, you must locate three clues inside the mansion. Enter through one of the top-floor windows to find all three clues conveniently located in a single room. For the second clue, interact with the letter on top of the writing desk on the western wall towards the southern corner. | ||
| Listen InNassau | Nassau | Related Quest:Once you have the letter from Chamberlaine's captain, you must locate three clues inside the mansion. Enter through one of the top-floor windows to find all three clues conveniently located in a single room. For the third and final clue, interact with the door on the northern wall of this room to listen in to a conversation happening just beyond it. | ||
| Petite Caverne Smuggler's Chest KeyPetite Caverne | Petite Caverne | Petite Caverne Smuggler's Chest Key is obtained from one of the smugglers in Petite Caverne. Look for him on the upper side (the top level on the southwestern side) of the camp, standing in front of the special chest. Use the key to open the large chest by the wall of the cave. | ||
| Important Notice - Note Location #1Matanzas | Matanzas | As you make your way from the docks to the entrance of the Matanzas Plantation, look on a wooden post on the docks just before you get to land to find a posted note—"Important Notice." We recommend reading it, as it provides info about the Matanzas Warehouse Key. It seems a thief was condemned to a gruesome fate by the jaws of some mysterious creature... | ||
| Listen to the GuardsMatanzas | Matanzas | Right off the main path in the southwestern corner of Matanzas Plantation, you'll spot a covered shelter down by a pond. Sneak up behind the two guards here to listen to their conversation and gain some good insight about the whereabouts of the Matanzas Warehouse key. | ||
| Steal the Flag from the Portuguese ShipCaribbean Sea | Caribbean Sea | Related Quest:During the "Black Bart's Gambi" quest you will be tasked with locating the Portuguese and then stealing its flag. Ship Coordinates: 72, 54. | ||
| Loot the ChestCaribbean Sea | Caribbean Sea | Related Quest:During the "Black Bart's Gambi" quest you will be tasked with locating a chest just upon the shore of this unnamed location in the Seranilla Sector of the Caribbean. Note: This chest is a quest item ONLY. | ||
| Anotto Bay Smuggler's Chest KeyAnotto Bay | Anotto Bay | Anotto Bay Smuggler's Chest Key is obtained from one of the smugglers in Anotto Bay camp. Look for him in the large cave, standing in front of the special chest. Use the key to open the large chest by the wall of the cave. | ||
| San Juan Smuggler's Chest KeySan Juan | San Juan | San Juan Smuggler's Chest Key is obtained from one of the smugglers in San Juan. Look for him on the lower side of the camp, patrolling around. Use the key to open the large special chest by the southern wall of the cave. | ||
| Jiguey Smuggler's Chest Key- Potential Location #2Jiguey | Jiguey | Related to: Jiguey Secret #1:- Underwater Chest Jiguey Smuggler's Chest Key is obtained from one of the smugglers in Jiguey. Deal with all the smugglers in the den, and loot their bodies to get it. Use the key to open the Jiguey Secret #1:- Underwater Chest at the bottom of the lake. This second potential location will be on a guard standing on the western side near the campfire. | ||
| Bill of SaleGrand Cayman | Grand Cayman | Related Quest:The Bill of Sale is a quest item you must obtain by pickpocketing the King of Fishermen during the "Templar Ships" Templar Hunt quest. Once you get the Bill of Sale, bring it to Opía Apito. | ||
| More Monkey GossipTortuga Island | Tortuga Island | Related Activity: Looting the Tortuga Warehouse To get the full story on the stolen Warehouse Key, hide in the bushes right out front of the main manor house within the plantation. Wait here to overhear two workers revealing that the monkey actually stole more than just the key—and had a little fun while doing it! | ||
| Redcoats Discuss Monkey WranglingTortuga Island | Tortuga Island | If you approach from the rooftop of the small shack in the back western part of the restricted area on Tortuga Island, you'll come across two guards staring at something behind the hay cart... Apparently, neither one of them is up for monkey wrangling. Guess who gets to do it instead? Just kidding! But take out these guards to get a good look for yourself. | ||
| Listen to the GuardsNew Bone | New Bone | Related Activity:Listen to the two guards just below the windmill with the viewpoint to gain some insight as to the warehouse key's whereabouts. | ||
| Listen to the WomernNew Bone | New Bone | Related Activity:Listen to the two women standing together just outside the manor house in the southwestern part of the plantation to learn more information regarding the whereabouts of the Warehouse Key. | ||
| Important Notice—NoteNew Bone | New Bone | Related Activity:Read the pinned note attached to the eastern wall of the New Bone Warehouse. You'll gather more intel on the warehouse key's whereabouts and learn more about this Lieutenant James Geary. | ||
| Journal of Diego MarquezLong Bay | Long Bay | Related Activity:Locate the journal entry on top of the crate to complete the nearby local event. | ||
| Kingston North Warehouse KeyKingston | Kingston | Related Activity:The Kingston North Warehouse Key is obtained by looting the officer patrolling the lower level of the northern manor. Use the Key to open and plunder the Kingston North Warehouse. | ||
| Kingston South Warehouse KeyKingston | Kingston | Related Activity:The Kingston South Warehouse Key is obtained by looting the officer in the back of the large barn. Use the Key to open and plunder the Kingston South Warehouse. | ||
| Jack Rackam in the GibbetPort Royal | Port Royal | Related Quest:
On the southwestern side of the prison, right at the western gates, you will find Jack Rackham inside a gibbet. Interact with him to trigger additional quest lore. | ||
| Hunter's Chest KeyKingston | Kingston | Related Activity:Hunter's Chest Key is a quest item related to the "Crow's Nest" local event in Kingston. The key is found on a tree branch by the small forest camp in the northern camp. Get the key to open the chest in the camp and complete the Local Event. How to Reach ItFace south. You will likely notice a tree in the right corner of the camp with an overturned cart against it—ignore this one. Instead, look toward the left side of the camp to spot another tree next to an empty square cage. Climb on top of the cage, then jump up to the branch above, then climb up once again and head to the end of this branch. Jump to the tree stump ahead, cross it, and leap to the final tree. At the end of this branch, you will find a crow's nest with the key tucked inside. Dive down into the hay cart below, then head beneath the camp's tents to find and unlock the chest. | ||
| Hunter's ChestKingston | Kingston | Related Activity:The Hunter's Chest is a quest item related to the "Crow's Nest" local event in Kingston. You can open it using the key found on a tree branch nearby. Get the key to open the chest in the camp and complete the Local Event. | ||
| Prison Cell KeyPort Royal | Port Royal | Related Quest:
The prison cell key needed for the main quest "To Suffer Without Dying" is located inside the underground prison. After speaking with Anne in her cell, immediately turn left and enter the adjacent room. Eliminate the two guards and collect the key resting on the desk. | ||
| Notice of DismissalKingston | Kingston | Related Quest:The Notice of Dismissal is a quest item you'll have to find and investigate while playing "The Maroon Assassin" Templar Hunt. The note is found on a table inside the Kingston Tavern. | ||
| Kenneth Abraham's Templar KeyKingston | Kingston | Related Quests:Kenneth Abraham's Templar Key is a quest item and a reward for assassinating Kenneth Abraham in Kingston. Edward will collect it automatically at the end of "The Commander's Ruse" Templar Hunt. The key is used to obtain the Templar Armor Outfit inside the Cove, as part of the "Damn Fine Gear" quest. | ||
| Vane's First LocationIsla Providencia | Isla Providencia | Related Quest:This is the first hiding spot you must track Vane to. He won't detect you immediately, so try and stealth your way as much as possible to avoid him shooting at you the entire time. Your goal is to climb up to where Vane is, at which point he will run off, putting you in pursuit. | ||
| Vane's Second LocationIsla Providencia | Isla Providencia | Related Quest:This is the second hiding spot you must track Vane to. As soon as you arrive, he will begin shooting and hurling explosives. Duck behind the available walls for cover and safely make your way to the ramp on your left (his right). Once you reach the top, the pursuit will resume, and you must follow him to his next location. | ||
| Vane's Final LocationIsla Providencia | Isla Providencia | Related Quest:This is the final location in your pursuit of Vane, featuring a setup very similar to the previous spot. He will continuously hurl bombs and shoot at you, so utilize the available walls for cover as you advance toward him. Once you reach his position, a cutscene will trigger, leading directly into your face-off against Charles Vane. | ||
| Tortuga Warehouse KeyTortuga Island | Tortuga Island | Related Activity: Looting the Tortuga Warehouse To finally recover the Tortuga Warehouse Key, head to the western side of the plantation's restricted area. You will find the key waiting inside a wooden box, complete with a pile of bananas right next to it—undeniable proof of the Drunken Monkey Bandit's handiwork! Snatch the key from the stash and use it to successfully plunder the Tortuga Island Warehouse! | ||
| New Bone Warehouse KeyNew Bone | New Bone | Related Activity:The New Bone Warehouse Key is obtained by looting James, Isabella's lover. You'll find both of them on the western side of the plantation, discussing in front of the Mayan Stela. Use the Key to open and plunder the New Bone Warehouse. | ||
| Neatly Folded LetterHavana | Havana | Related Quest: Big Wig—Officer Quest The Neatly Folded Letter is a quest item and part of Barrister's treasure, which you'll have to retrieve at the end of the "Big Wig" Officer Quest. You'll find it by a bush in the small gulf on the northwestern side of Havana. | ||
| Follow the GuardHavana | Havana | Related Activity: Havana Warehouse On your first visit to the Havana Warehouse, listen for two guards arguing near the front entrance. Use the prompt to eavesdrop, then follow the officer to find a clue regarding the warehouse key. | ||
| Guards Discussing Monkey BusinessTortuga Island | Tortuga Island | Related Activity: Looting the Tortuga Warehouse Right as you step off the dock, look straight ahead at the front gates of Tortuga Plantation. Press the corresponding button when the "Look" prompt appears to overhear an urgent conversation between the 2 guards. Apparently, a Monkey has run off with the Warehouse Key! | ||
| Stede Bonnet's First LetterGreat Inagua | Great Inagua | Related Quest:To begin the side quest "Captain Stede Bonnet",, look for the letter resting on a table in the living room of the manor at Great Inagua. | ||
| Jiguey Smuggler's Chest Key- Potential Location #1Jiguey | Jiguey | Related to: Jiguey Secret #1:- Underwater Chest Jiguey Smuggler's Chest Key is obtained from one of the smugglers in Jiguey. Deal with all the smugglers in the den, and loot their bodies to get it. Use the key to open the Jiguey Secret #1:- Underwater Chest at the bottom of the lake. This first potential location will be on a guard standing on the eastern side. | ||
| Meet James Kidd- Accept Assassin Contracts ActivityTulum | Tulum | Related Quest: Overrun and Outnumbered Right after the quest "Overrun and Outnumbered" wraps up, you will have a chat with James Kidd, who will then ask James to work for the Assassins by accepting their contracts in exchange for money. How Assassin Contracts Work:
| ||
| Glass CubeCape Bonavista | Cape Bonavista | Related Quest: Sequence 1—Edward Kenway The Glass Cube is a quest item you'll obtain automatically after defeating the assassin Duncan Walpole at the end of the "Edward Kenway" quest. The Cube is required to progress the rest of the story. | ||
| Stede's Money PurseHavana | Havana | Related Quest: Lively Havana Stede's Money Purse is a quest item you'll have to retrieve during the "Lively Havana" quest. The purse belongs to Stede, who is being robbed while you synchronize the first viewpoint. Catch the thief, grab the purse, and bring it back to Stede to progress the quest. | ||
| Castillo Warehouse KeyHavana | Havana | Related Quest: ...And My Sugar? The Castillo Warehouse Key is obtained from Captain Mendoza by pickpocketing him. Alternatively, you can obtain it by knocking him out while he is inspecting the goods on the upper wall of Castillo de la Real Fuerza. The key is used during the "...And My Sugar?" quest to unlock the storeroom on the upper wall and obtain the stolen goods. | ||
| Record of Confiscated Goods-ClueHavana | Havana | Related Quest: ...And My Sugar? The Record of Confiscated Goods is found on a table inside the eastern Castillo de la Real Fuerza tower. You can get inside via the northern window by dropping from the upper wall. The Record of Confiscated Goods can be retrieved only while playing the " ...And My Sugar?" quest, and it offers more information about the goods you are looking for. | ||
| Stolen GoodsHavana | Havana | Related Quest: ...And My Sugar? Found inside the room on the roof of the Castillo de la Real Fuerza. The Stolen Goods must be retrieved while playing the " ...And My Sugar?" quest. To get inside the room, you must pickpocket the Castillo Warehouse Key from Captain Mendoza. | ||
| Templar RingHavana | Havana | Related Quest: Mister Walpole, I Presume? The Templar Ring is a quest item you'll receive from Governor Torres while playing "Mister Walpole, I Presume?" quest. The ring is used to progress the story. | ||
| Curious SchematicHavana | Havana | Related Quest: Mister Walpole, I Presume? The Curious Schematic is a quest item you'll receive after leaving the Governor's mansion while playing "Mister Walpole, I Presume?" quest.The Schematic is used to progress the story. | ||
| NoticeHavana | Havana | Related Quest: Claiming What's Due The Notice is pinned on a wooden board. During the "Claiming What's Due" quest, you can read it to find out more about the Sage's whereabouts. | ||
| Havana Prison KeyHavana | Havana | Related Quest: Claiming What's Due The Havana Prison Key can be obtained from the warden in the courtyard. He spawns during the "Claiming What's Due" quest, and you can assassinate him to get the key and release the Sage. | ||
| Large Enemy ShipAbaco Island | Abaco Island | Related Activity:On your second visit to the island, an enemy camp will spawn, and along with it a very large beached ship. The ship will have it's own loot for you to find inside. | ||
| Hang Stede Bonnett's PortraitGreat Inagua | Great Inagua | Related Quest:Honor the "Gentleman Pirate" after finishing his side quest! Return to Great Inagua, head down into the manor's basement, and hang Stede Bonnet's portrait on the wall. Once placed, the portrait officially becomes a part of your inventory! | ||
| FishAbaco Island | Abaco Island | Related Quest:The Fish is found in front of the tent in the Abaco Island Camp. You'll have to examine it to progress the "This Tyro Captain" quest. | ||
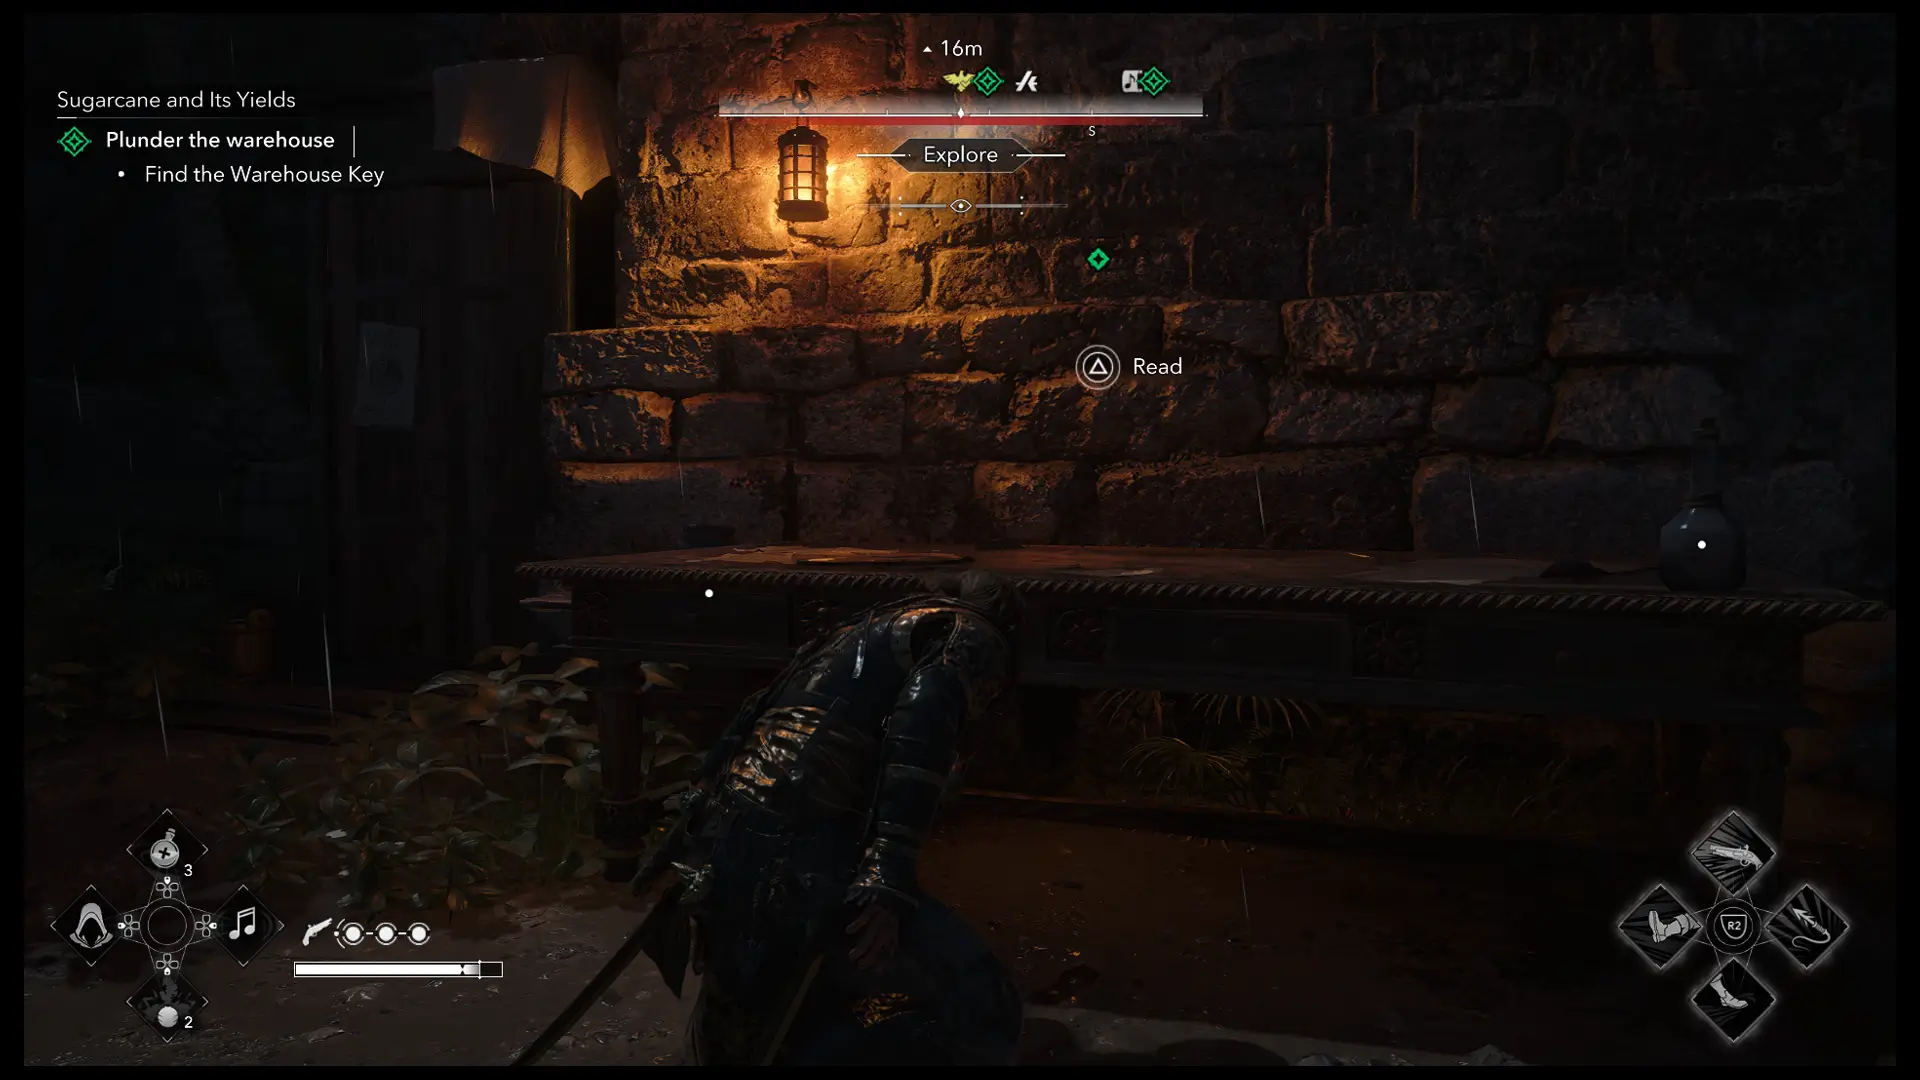
| Birthday Announcement Location #3Cat Island | Cat Island | Related Quest:During the quest "Sugarcane and Its Yields" on Cat Island, you can look for a letter that provides intel on the warehouse key's whereabouts. Near the western part of this hostile area, right beside the manor, there are 2 guards near a camp fire around some stacked crates. Look on top of one of the crates to find a letter called “Birthday Announcement." It appears Emerson Beckford is calling for a celebration, which gives you a clue as to where you might find the warehouse key... | ||
| Unspoiled CratesAbaco Island | Abaco Island | Related Quest:The Unspoiled Crates are found in the Abaco Island camp. You'll have to loot them to progress in the " This Tyro Captain" quest. | ||
| Mauled MenAbaco Island | Abaco Island | Related Quest:The Mauled Men are found in the Abaco Island Camp. You'll have to examine them to progress the "This Tyro Captain" quest. | ||
| PawprintsAbaco Island | Abaco Island | Related Quest:Pawprints can be found behind the broken cart in the Abaco Island Camp. You'll have to examine them to progress the "This Tyro Captain quest." | ||
| Havana Warehouse KeyHavana | Havana | Related Activity: Havana Warehouse. The Havana Warehouse Key is obtained by looting the officer on the northern side of the plantation. Both the officer and the key become available once you complete the "This Tyro Captain" quest. Use the Key to open and plunder the Havana Warehouse. | ||
| Nassau Warehouse KeyNassau | Nassau | Related to:The Nassau Warehouse Key is obtained by looting the officer on the island's southern side. You'll spot him on the beach. Use the Key to open and plunder the Nassau Warehouse. Both the officer and the key become available as you progress the Now Hiring quest. | ||
| Captain's NoticeNassau | Nassau | Related to:The "Captain's Notice" note is found pinned on the wall of the Nassau Warehouse. Reading it will give you more clues about the potential location of the Warehouse Key in Nassau. | ||
| Endeavor Cargo ManifestAndreas Island | Andreas Island | Related Quest: Sugarcane and Its Yields The "Endeavor Cargo Manifest" is a quest item you'll need to retrieve from Beckford's agent while playing the "Sugarcane and Its Yields" quest. It is required to progress the story, and you can obtain it via pickpocketing or by killing the agent. | ||
| Birthday Announcement Location #2Cat Island | Cat Island | Related Quest:The "Birthday Announcement" Note is found on a table by the building with the Cat Island Viewpoint. Read it while playing the "Sugarcane and Its Yields" quest to find additional details about the celebrations on the island and the location of the Warehouse Key. | ||
| Cat Island Warehouse KeyCat Island | Cat Island | Related Quest/Activity:The Cat Island Warehouse Key is obtained by looting Mr. Beckford in the back of his manor on Cat Island. You'll spot him alongside his guests. The key is required to progress the "Sugarcane and Its Yields" quest. Use the Key to open and plunder the Cat Island Warehouse. | ||
| Du Casse's Templar KeyGreat Inagua | Great Inagua | Related Quest:Du Casse's Templar Key is a quest item and a reward for assassinating Julien du Casse. Edward will collect it automatically at the end of the "A Single Madman" quest. The key is used to obtain the Templar Armor Outfit inside the Cove, as part of the Damn Fine Gear quest. | ||
| Investigate Templar Presence: EavesdropGrand Cayman | Grand Cayman | Related Quest:Head down to the beach behind the Tavern to find two NPCs talking beneath a covered shelter. Sneak into the area and slip into the bushes to stay out of sight. Once you are hidden, trigger the prompt to eavesdrop on their secret conversation and uncover more about the Templar presence! | ||
| Locate the King of FishermenGrand Cayman | Grand Cayman | Related Quest:Head to the northwestern part of the village to track down the King of Fishermen. You will need to follow up so you can pickpocket the "Bill of Sale" document from him. | ||
| Investigate Clues of White JaguarCayman Sound | Cayman Sound | Related Quest:Search the immediate area Opia takes you to to search for clues of the White Jaguar's whereabouts:
| ||
| Search for the White JaguarCayman Sound | Cayman Sound | Related Quest:During the "The Taino Assassin" Templar Hunt quest, you are tasked with locating a mysterious White Jaguar plaguing the island. Follow the path into this specific area, where you will finally spot the beast and begin your hunt. | ||
| Lucia Márquez's Templar KeyPinos Isle | Pinos Isle | Related Quests:Lucia Márquez's Templar Key is a quest item and a reward for assassinating Lucia Márquez on Pinos Isle. Edward will collect it automatically at the end of "The Trail of Lucia Márquez" Templar Hunt. The key is used to obtain the Templar Armor Outfit inside the Cove, as part of the "Damn Fine Gear" quest. | ||
| Listen in to the WardenHavana | Havana | Related Quest: Claiming What's Due You can hide in the bushes here near the back western wall and hit your prompt button to "listen in" on the warden's conversation regarding the sage during the "Claiming What's Due" quest. | ||
| Letter From DecasseHavana | Havana | Related Quest: Claiming What's Due A letter to the warden warning about the sage being the "slippery sort" and the need to double the guard, as well as a clue to where to find the keys in the quest "Claiming What's Due". | ||
| A Pickpocketed MapHavana | Havana | Related Quest: A Thief in the Market—Templar Hunt. A Pickpocketed Map is a quest item you'll have to retrieve from the thief in the market while playing the " A Thief in the Market" Templar Hunt. Chase the thief, assassinate him, then loot his body and get the map. Once you have it, bring it to Rhona Dinsmore to start the next part in the Havana Templar Hunt Questline (Arms Race). | ||
| Powder Reserve #1Havana | Havana | Related Quest: Arms Race—Templar Hunt The first Powder Reserve Keg is found in the restricted courtyard west of the Basilica Menor de San Francisco de Asis in Havana. The Keg must be destroyed as part of the "Arms Race" Templar Hunt. | ||
| Powder Reserve #2Havana | Havana | Related Quest: Arms Race—Templar Hunt The second Powder Reserve Keg is found in the restricted courtyard west of the central Havana market. The Keg must be destroyed as part of the "Arms Race" Templar Hunt. | ||
| Powder Reserve #3Havana | Havana | Related Quest: Arms Race—Templar Hunt The third Powder Reserve Keg is found in the restricted courtyard on the northwestern side of Havana. Look for it under a pergola. The Keg must be destroyed as part of the "Arms Race" Templar Hunt. | ||
| Hilary Flint's Templar KeyHavana | Havana | Related Quests: Hilary Flint's Templar Key is a quest item and a reward for assassinating Hilary Flint in Havana. Edward will collect it automatically at the end of the "Flint's End" Templar Hunt. The key is used to obtain the Templar Armor Outfit inside the Cove, as part of the Damn Fine Gear quest. | ||
| PlantainGreat Inagua | Great Inagua | Related Quest: The One With the Gun—Officer Quest The Plantain is a bucket of fruit and a quest item. You'll get to carry it to the villa while playing "The One With the Gun" Officer Quest. Pick it up and carry it back to Edward's mansion. | ||
| Last Will and Testament - NoteBlack Island | Black Island | Related Quest: The Last Will and Testament is found on the upper floor of the Baldwin mansion on Black Island. It is a quest item you'll need to investigate while playing "The One With the Gun," Officer Quest. | ||
| Barrister's Letter - NoteBlack Island | Black Island | Related Quest: Barrister's Letter is found on the ground floor of the Baldwin mansion on Black Island. It is a quest item you'll need to investigate while playing "The One With the Gun," Officer Quest. | ||
| Black Island Warehouse KeyBlack Island | Black Island | The Black Island Warehouse Key is obtained by looting the officer on the island's southwestern side, near the main house, next to a campfire. You can sneak up into the tree above him to take him out easily. Note: Both the officer and the key are not available if you explore the island while playing the Officer Quest: The One With the Gun, so make sure to finish the quest first. Make sure to loot the guard so you can use the Key to open and plunder the Black Island Warehouse. | ||
| Jing Lang's NoteNassau | Nassau | Related Quest:Jing Lang's Note is a vital clue you will need to locate while playing "The Other Brother" Templar Hunt. You can find this note resting just outside the house while conducting your investigation for the quest. | ||
| Jing Lang's Templar KeyNassau | Nassau | Related Quests:Jing Lang's Templar Key is a quest item and a reward for assassinating Jing Lang in Nassau. Edward will collect it automatically at the end of "Queen of Pirates, King of Fools" Templar Hunt. The key is used to obtain the Templar Armor Outfit inside the Cove, as part of the "Damn Fine Gear" quest. | ||
| A Letter to Emma-NoteNassau | Nassau | Related to:Resting on a crate near the warehouse's key-holding officer, this discarded letter offers a glimpse into his recent activities. Read it to uncover exactly what the local guards have been plotting behind closed doors. | ||
| Slave Ledger NoteKingston | Kingston | Related Quest:Letter from Torres is a quest item found in Kingston, on a wooden table in the courtyard behind the central church. It is the clue you'll need to find while playing the "Traveling Salesman" Main Quest. | ||
| Letter from TorresKingston | Kingston | Related Quest:Letter from Torres is a quest item found in Kingston, on a wooden table in the courtyard behind the central church. It is the clue you'll need to find while playing the "Traveling Salesman" Main Quest. | ||
| Campsite Letter - NoteFlorida | Florida | Related Event: Gold Locket Local Event The Campsite Letter doesn't count as a collectible, but it offers information on what happened in the camp on the northern side of Florida Island. You'll find it next to the body of a fallen soldier. The information is related to the "Gold Locket" event in Havana. | ||
| Gold LocketFlorida | Florida | Related Quest: Gold Locket Local Event (Havana) The Gold Locket is a quest item that can be found inside an underwater chest on the western coast of Florida. Note: Chest Coordinates are 380,800. Make sure that once you find it, you return to Havana to complete the Gold Locket Local Event. | ||
| Important Notice - Note Location #2Matanzas | Matanzas | Another "Important Notice" note is pinned on the pillar outside the manor on the northern side of the house. We recommend reading it, as it provides info about the Matanzas Warehouse Key. It seems a thief was condemned to a gruesome fate by the jaws of some mysterious creature... | ||
| Lucia's Feeding Schedule - NoteMatanzas | Matanzas | The "Lucia's Feeding Schedule" note is found on the upper floor of the Matanzas Manor. Look for it in the corner of the room, on a barrel. Give it a read to uncover exactly what kind of beast has been feasting on condemned thieves... | ||
| Matanzas Warehouse KeyMatanzas | Matanzas | The Matanzas Warehouse Key is obtained by looting the corpse of the officer in Lucia's swamp on the southwestern side of the plantation. After you deal with Lucia, look for the corpse inside her nest. Use the Key to open and plunder the Matanzas Warehouse. | ||
| NPC CoversationKingston | Kingston | Related Activity:Listen to two NPC's in this area to find out more relevant information as to the warehouse key's whereabouts. | ||
| Examine Clue-Ducasse's GunsCape Bonavista | Cape Bonavista | Related Quest:Examine the box of guns inside of the restricted enemy cave during Padre's Officer Quest. | ||
| Examine Clue-The Bishop's WineCape Bonavista | Cape Bonavista | Related Quest:Examine the crate of wine inside of the restricted enemy cave during Padre's Officer Quest. | ||
| Read the Clue: Bishop's Orders NoteCape Bonavista | Cape Bonavista | Related Quest:Examine the note hanging from the tree inside of the restricted enemy cave during Padre's Officer Quest. | ||
| Find the Bishop's Location Clue #1-A Warning NoteKingston | Kingston | Related Quest:To find where the Bishop is hiding in Kingston, locate the first clue right by the quest's start location. You will see several people gathered around a sign. Walk up and interact with it to read a posted note warning the locals to stay far away from the Bishop. | ||
| Find the Bishop's Location Clue #2-Follow the ManKingston | Kingston | Related Quest:To find where the Bishop is hiding in Kingston, head toward the docks near Kingston General Store #1 and eavesdrop on the two men speaking nearby. Once their conversation finishes, follow the target and pickpocket the letter they mentioned. | ||
| Bishop's Location Clue #3-Ladies on the DocksKingston | Kingston | Related Quest:To find where the Bishop is hiding in Kingston, head toward the dock near Kingston General Store #1 and eavesdrop on the two women at the very end of it to gain some insight into the bishop's whereabouts. | ||
| Dinah's Food PlateCaracol | Caracol | Related Quest: A Second Chance—Officer Quest Dinah's plate is found by the roasted pig cooked by Padre. Make sure you bring it to Dinah while playing the "A Second Chance" Officer Quest. | ||
| Duty Roster LetterGreat Inagua | Great Inagua | Related Quest:This letter can be found in southwestern Great Inagua during the "A Single Madman" quest. Item Coordinates: 810, 435 Head north on the main path and descend the hill to a small enemy camp. Clear the enemies to safely loot the salvage crate and collect the letter sitting on an adjacent crate. Give it a read to discover that your target, Julien du Casse, is calling in extra guards to lock down his manor! | ||
| Ambergris Key Smuggler's Chest KeyAmbergris Key | Ambergris Key | Related Activity: Related Quest: The Ambergris Key Smuggler's Chest Key is obtained from one of the smugglers in Ambergris Key. If it's your first time visiting during the "The Outlaw's Cave" Assassin Contract, the key holder will be the Templar aristocrat you'll need to assassinate. You'll spot him patrolling the corridor on the upper side of the Mayan Temple. Use the key to open the Ambergris Key Special Chest. | ||
| Diving BellNassau | Nassau | Related Quest:Location of the Diving Bell you'll need to obtain for the "Diving for Medicines" quest. You can also simply purchase it from the Harbourmaster. | ||
| Birthday Announcement Location #1Cat Island | Cat Island | Related Quest:During the quest "Sugarcane and Its Yields" on Cat Island, you can look for a letter that provides intel on the warehouse key's whereabouts. Near the north-center section of this hostile area, there is a stack of crates conveniently lined up to hide behind. Look on top of one of the crates to find a letter called “Birthday Announcement." It appears Emerson Beckford is calling for a celebration, which gives you a clue as to where you might find the warehouse key... | ||
| MedicinesSan Ignacio Wreck | San Ignacio Wreck | Related Quest:Found in the San Ignacio Wreck, the medicines are required to progress through the " Diving for Medicines" main quest. The medicines are located inside of a chest at the bottom of a shipwreck, accessible via a hatch on top of the wreckage. Make sure to take a big breath of air before entering! Once you open the hatch, swim down and interact with the chest. Edward will automatically move the wood resting on top of it, but this action causes debris to block your exit. To escape, you must move forward through the underwater tunnel, but don't worry- you'll get to a place towards the center of the tunnel where you can swim up for air! |

© MapMaster.io 2024. All rights reserved.